Connect Claude
Connect Posteady to Claude — in the app, or with a JSON config file.
Once connected, you can publish and schedule posts to Threads and X — and check how they performed — right from a Claude chat.
Before you begin
- A Posteady account — you'll sign in during setup. MCP connection requires the Creator plan or above.
- In the Claude app: a Claude Pro, Max, Team, or Enterprise plan (custom connectors aren't available on the free plan). Set up on Claude web or desktop; once connected, it works in the mobile app too.
- With a config file: any client that reads MCP servers from a config file, such as Claude Code.
Connect in the Claude app
The easiest way — just a few clicks, no config files.
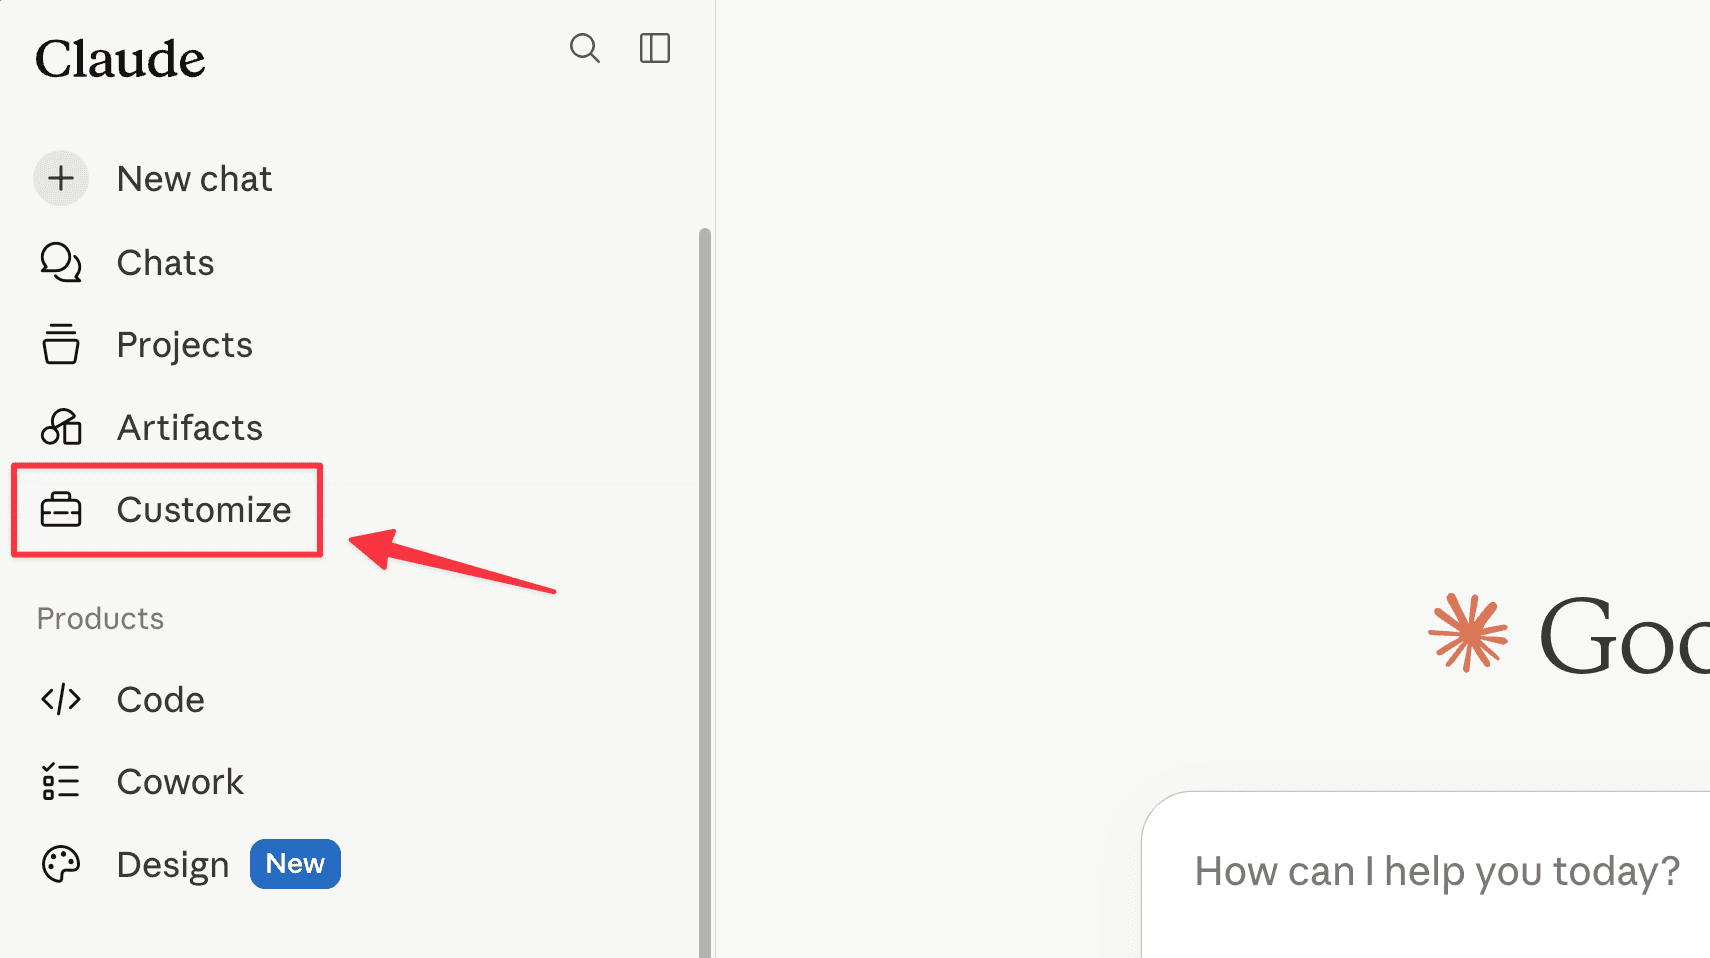
1. Open Customize
In Claude's left sidebar, click Customize.
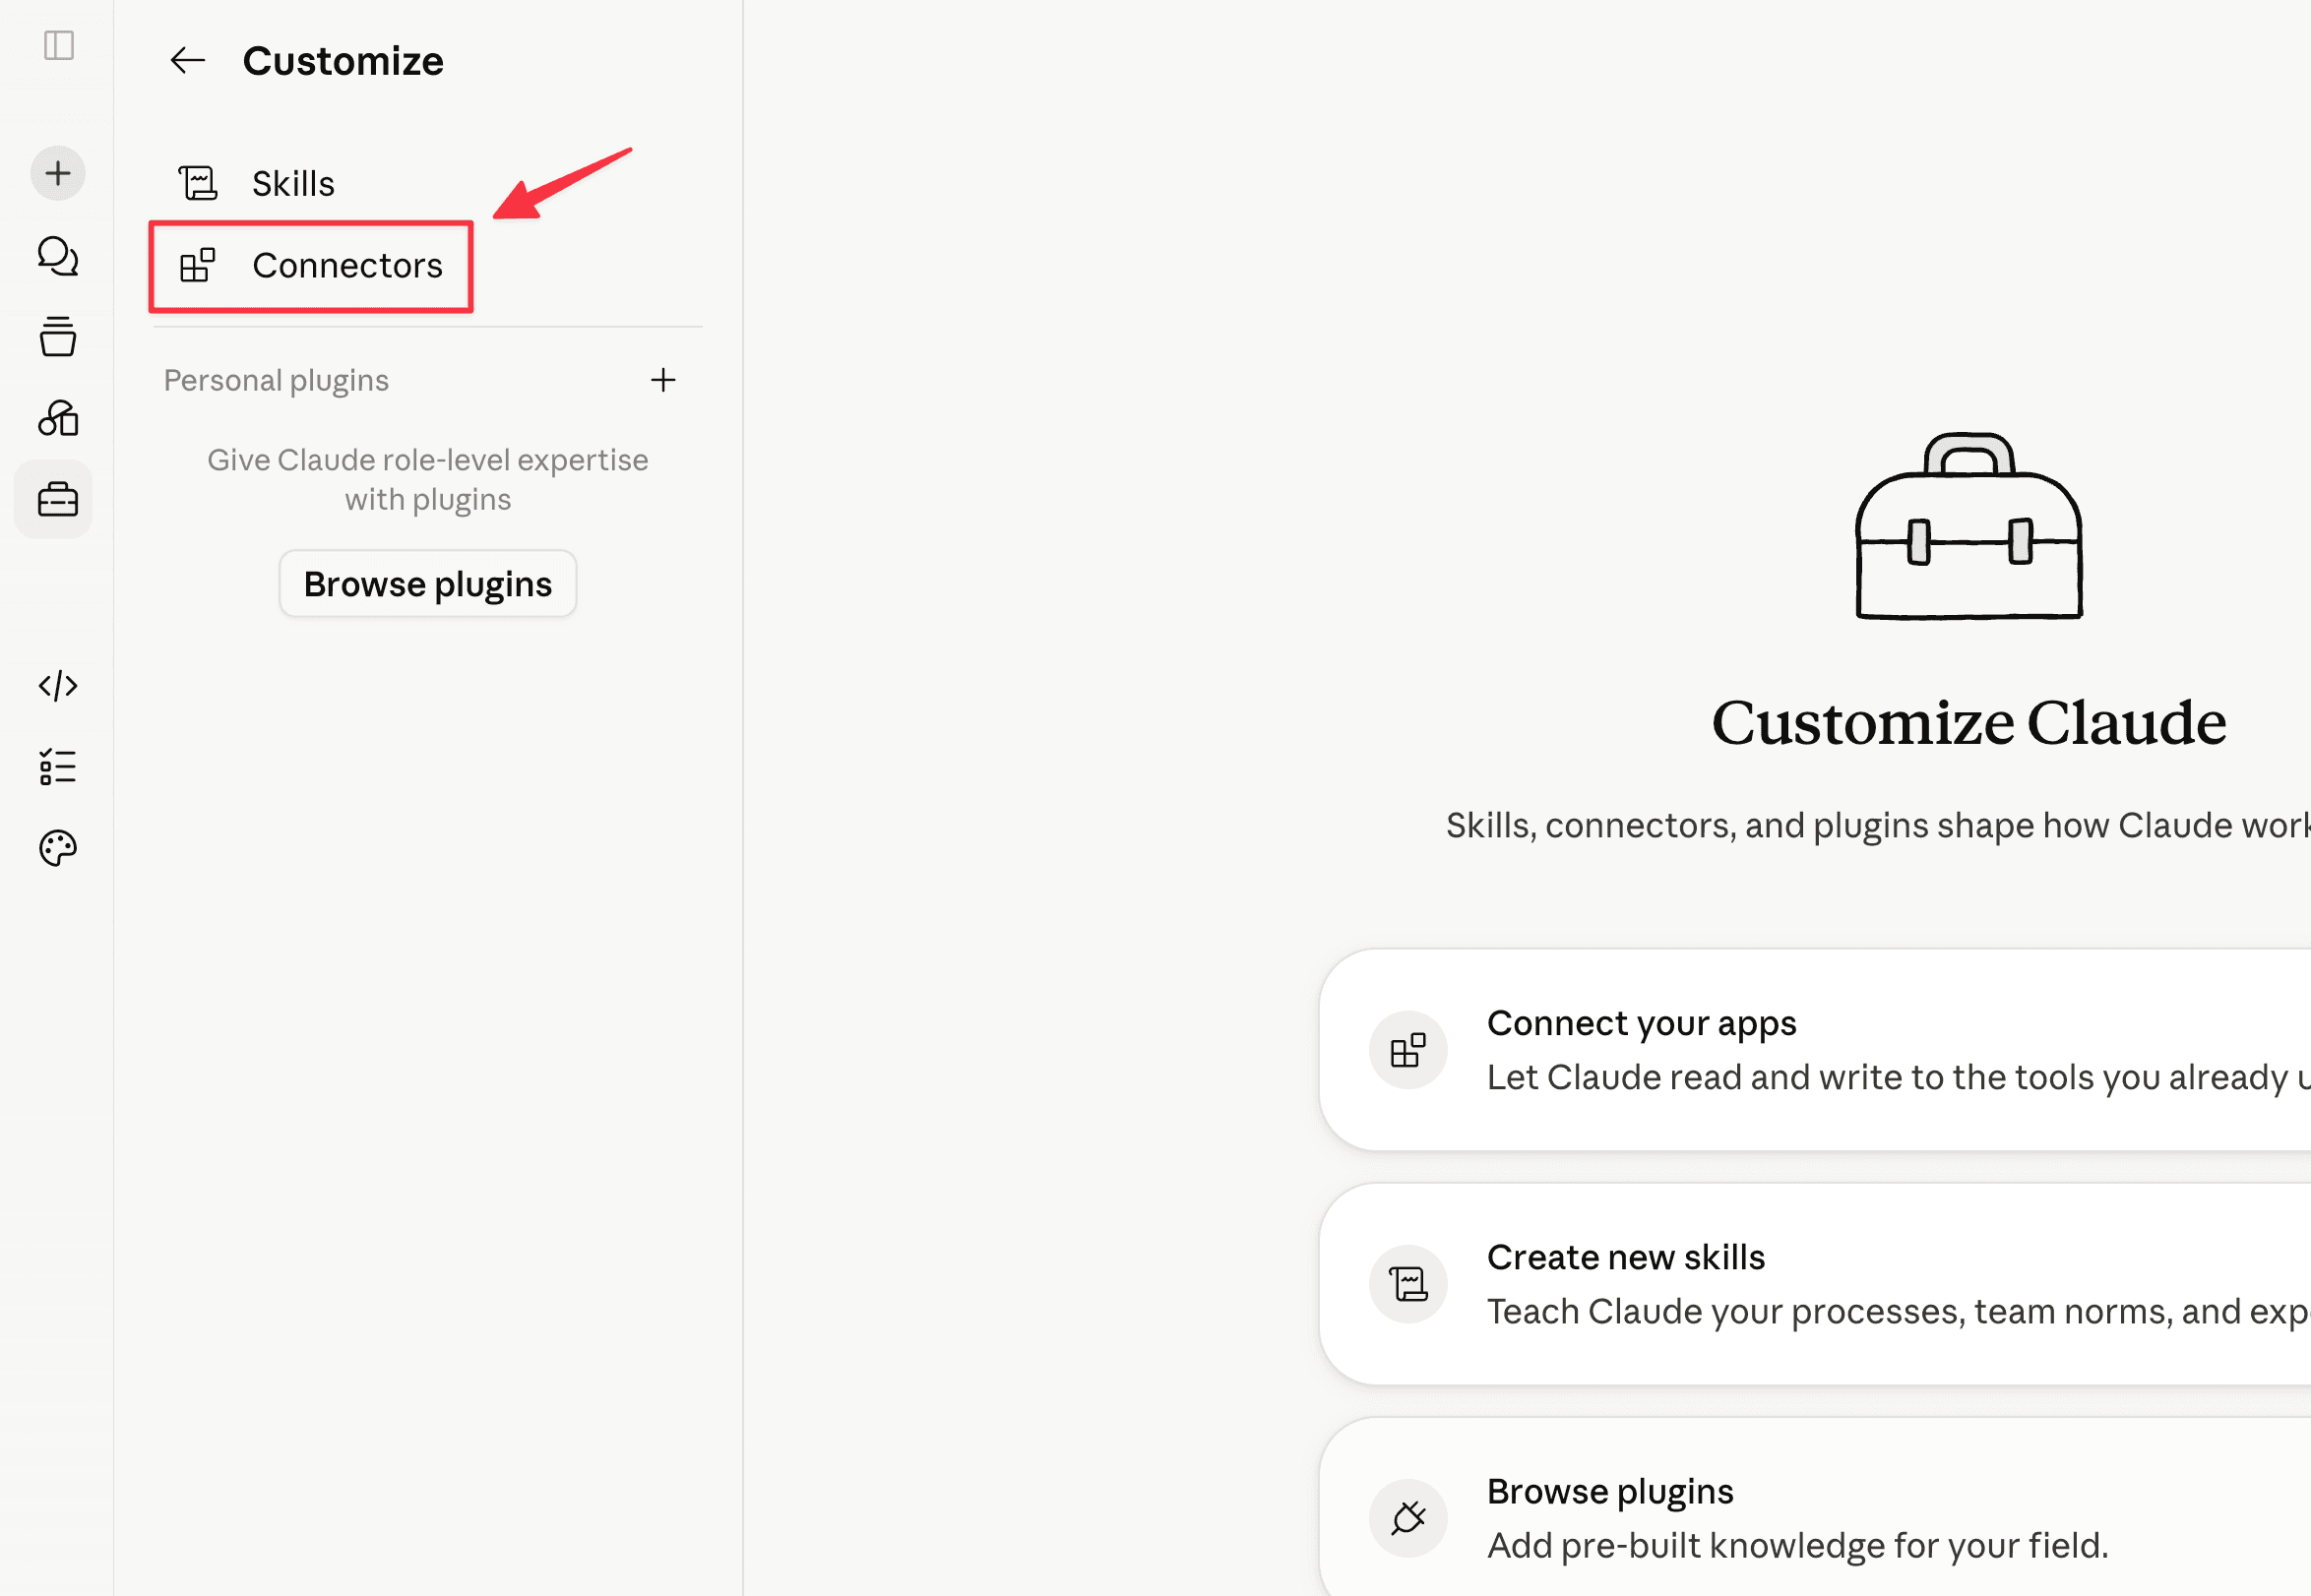
2. Open Connectors
Select Connectors.
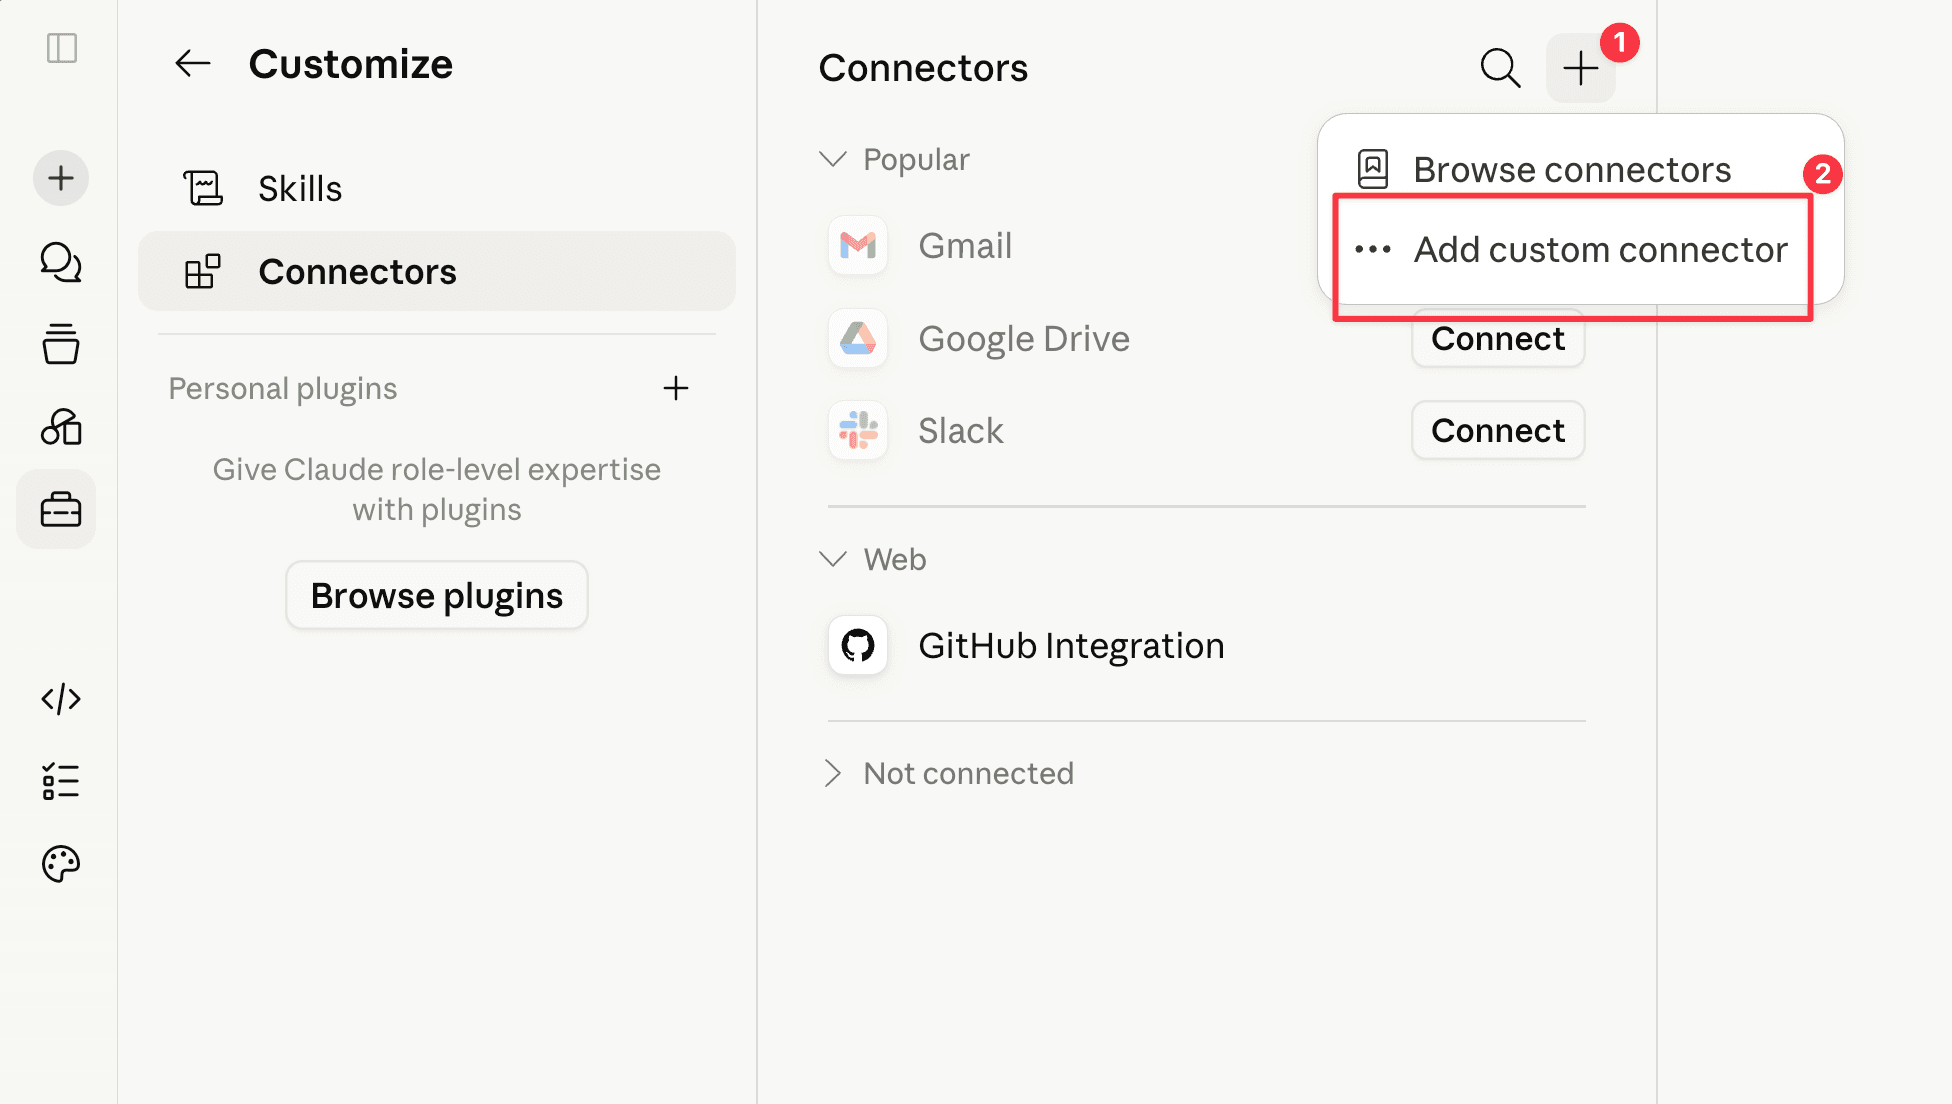
3. Add a custom connector
Click the + button (top right) and choose Add custom connector.
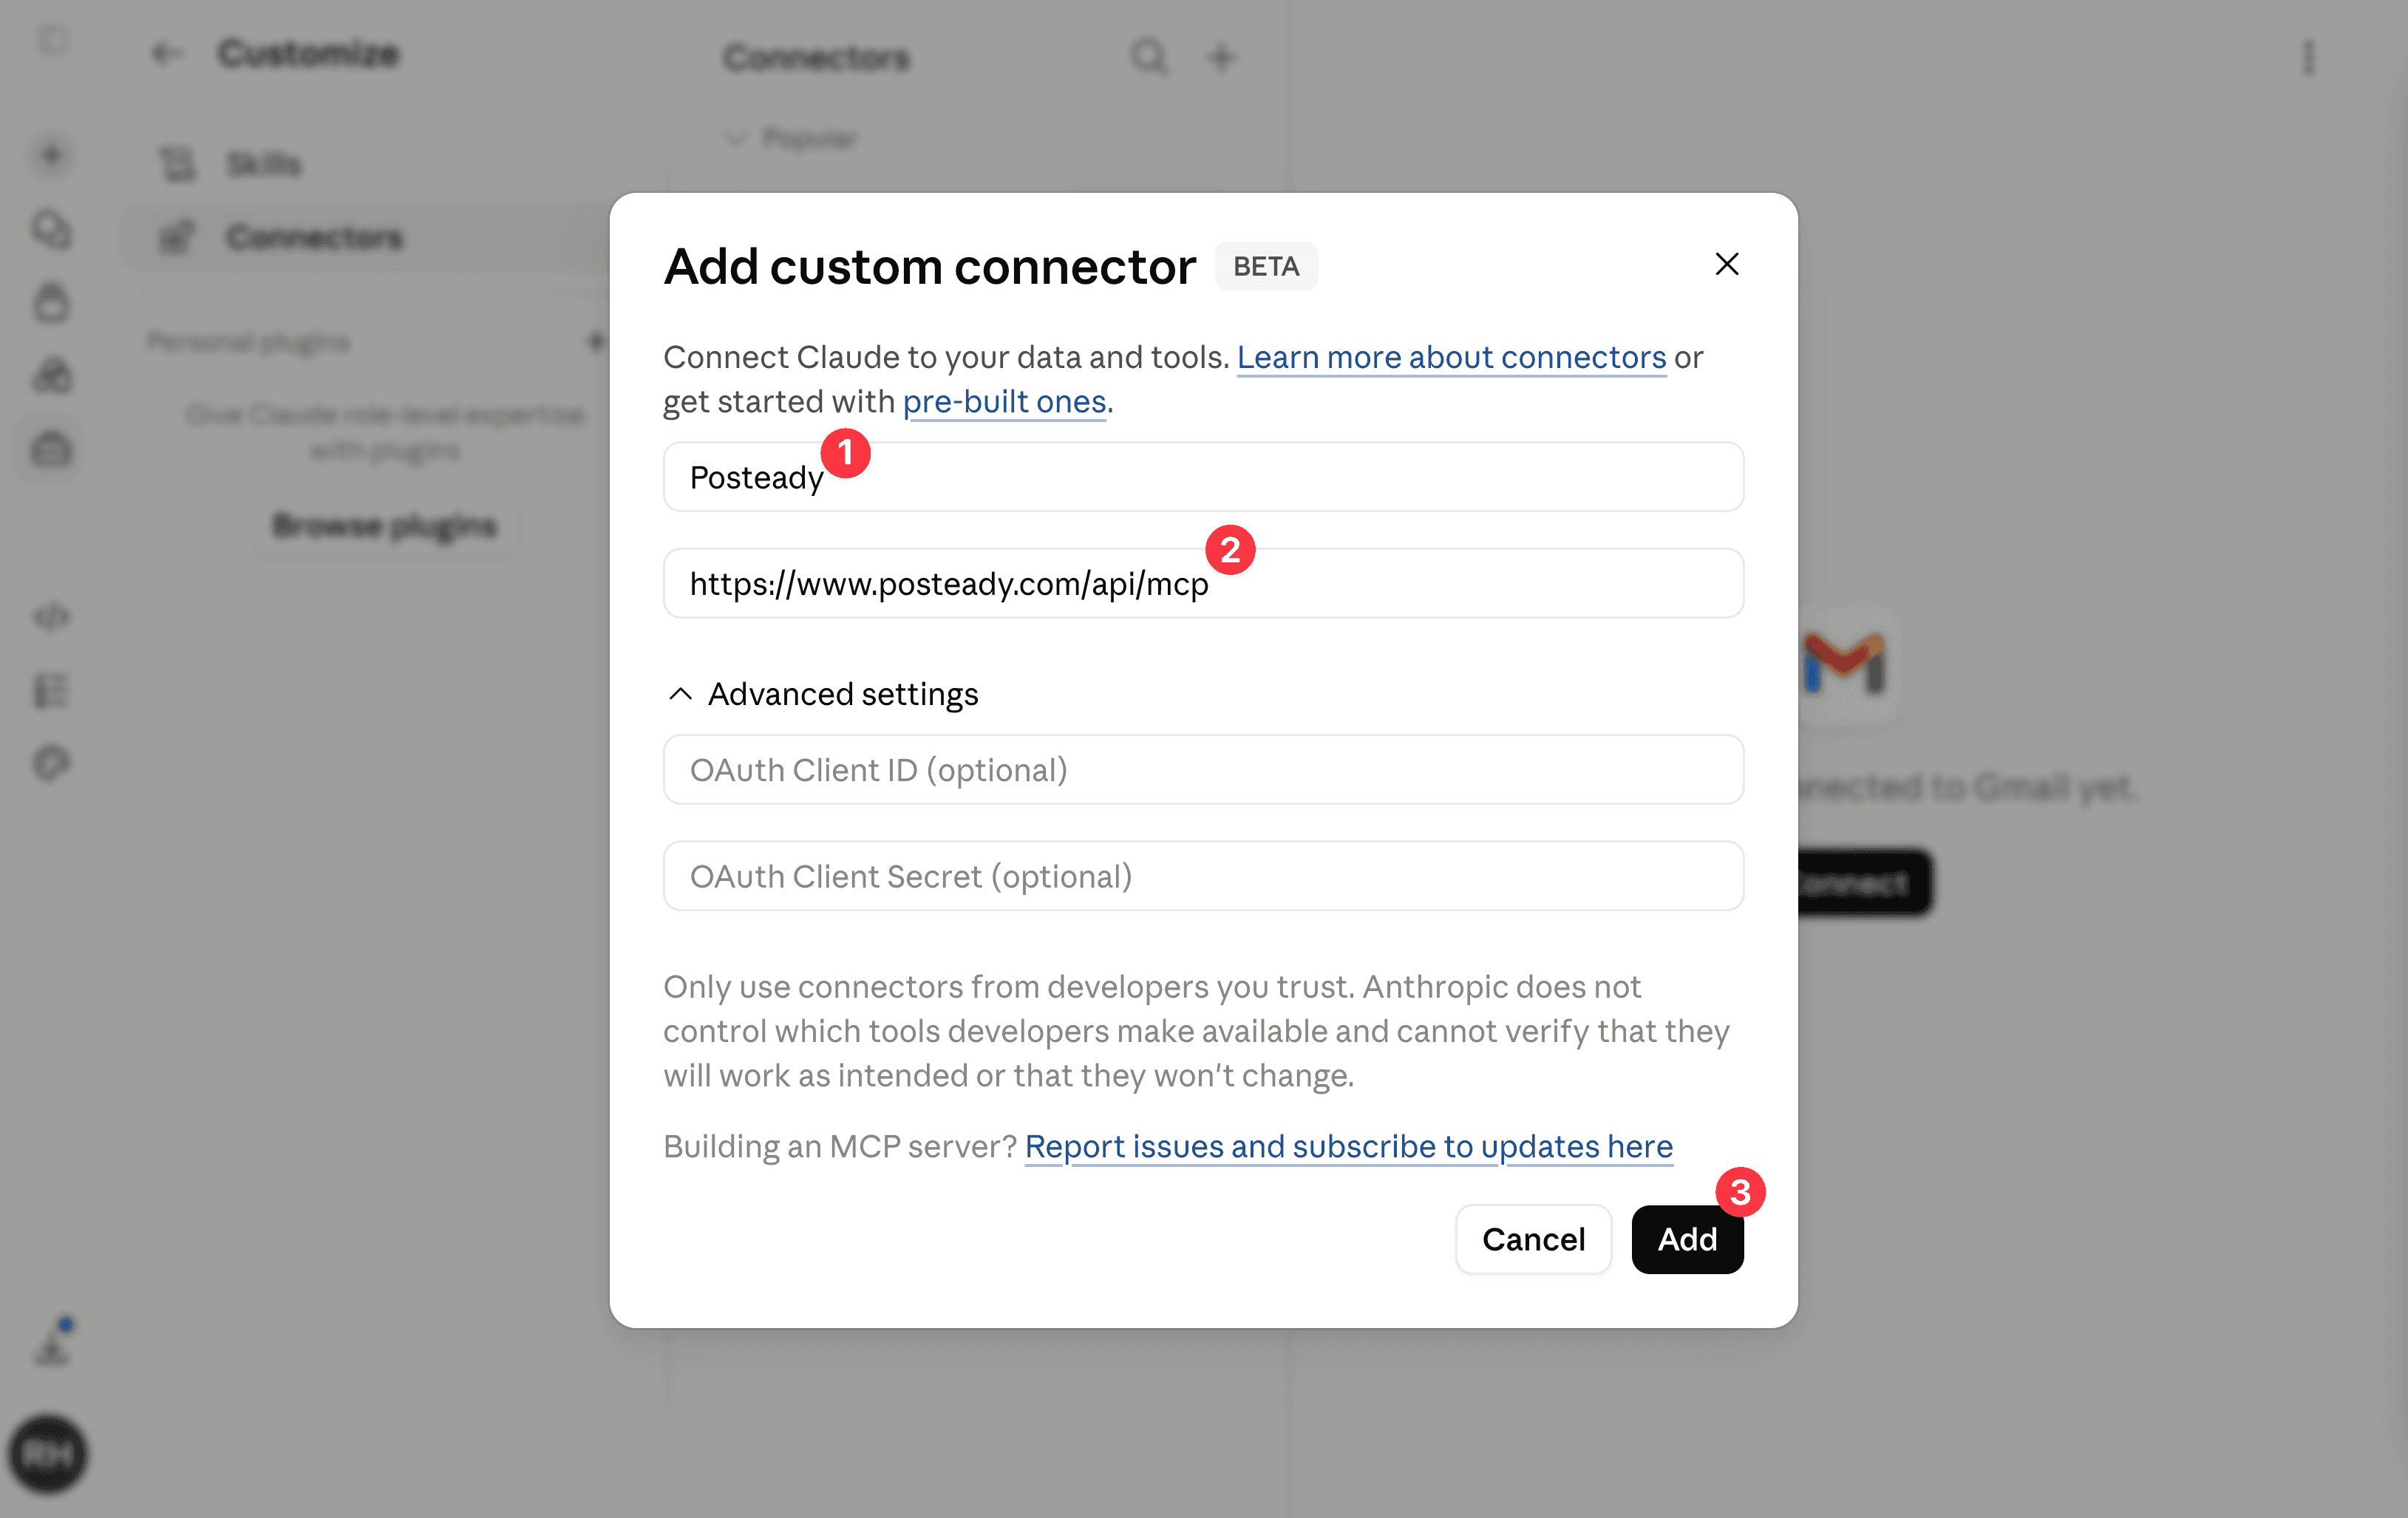
4. Enter Posteady's details
Fill in the fields and click Add. You can leave the Advanced settings (OAuth Client ID / Secret) empty.
| Field | Value |
|---|---|
| Name | Posteady |
| Remote MCP server URL | https://www.posteady.com/api/mcp |
5. Approve access
A "Claude is requesting access to Posteady" screen appears. Review the target workspace and click Allow. The first workspace in the list is the default — you can also target another eligible workspace from within a chat.
If you're not signed in to Posteady yet, you'll sign in first, then this screen appears.
6. Use it in a chat
Ask in plain language, for example:
- "List my connected accounts"
- "Schedule a post on X for 9am tomorrow: 'Launch day -1'"
- "Publish this to Threads and X now: [your text]"
- "Show last week's posts with views and likes"
Claude asks you to confirm before publishing, scheduling, or canceling — review the action, then approve.
Connect with a config file (JSON)
Prefer the terminal? Claude Code reads MCP servers from a config file.
Add Posteady over HTTP:
claude mcp add --transport http posteady https://www.posteady.com/api/mcpOr add it to your project's .mcp.json:
{
  "mcpServers": {
    "posteady": {
      "type": "http",
      "url": "https://www.posteady.com/api/mcp"
    }
  }
}
Then run /mcp inside Claude Code and complete the Posteady sign-in to authorize.
Using Cursor, Gemini CLI, or another tool? See the Cursor, Gemini, and Other tools guides.