Connect ChatGPT
Connect Posteady to ChatGPT with Developer Mode and a custom connector.
Connect Posteady to ChatGPT and you can publish or schedule posts to Threads and X — and check how they performed — straight from the chat box. Follow the steps below and you'll be set up in about five minutes.
Unlike Claude, ChatGPT connects to Posteady only through the in-app connector (Developer Mode) — there's no JSON config-file method for the ChatGPT app.
Before you begin
- A paid ChatGPT plan is required. Custom connectors (Developer Mode) are available only on Plus · Pro · Team · Enterprise · Edu. The free plan isn't supported.
- You need a Posteady account. You'll sign in to Posteady (granting permission) during setup.
- Set up on the ChatGPT web or desktop app. Once connected, it works automatically in the mobile app too.
Menu names may appear slightly differently depending on your ChatGPT version — "Connectors" or "Apps & Connectors".
Step 1 · Turn on Developer Mode
- Click your profile icon (bottom-left, or top-right).
- Open Settings.
- Select Apps & Connectors (or Connectors).
- Click Advanced at the bottom of the page.
- Toggle Developer Mode to ON.
Custom connectors run an external server's code on your behalf, so you'll see a warning when enabling it. Only connect services you trust (like Posteady).
Step 2 · Add the Posteady connector
-
Go back to the Apps & Connectors screen.
-
Click Create (or Add custom connector).
-
Enter the following:
Field Value Name PosteadyDescription Publish & schedule posts to Threads/X and view performanceMCP Server URL https://www.posteady.com/api/mcpAuthentication OAuth (shown automatically) -
Click Create.
Step 3 · Sign in to Posteady (grant access)
- After you add the connector, a Posteady sign-in window opens as a popup.
- Make sure your browser isn't blocking popups.
- Log in with your Posteady account and approve ChatGPT's access to your workspace.
- Once approved, the connector status changes to Connected.
Step 4 · Use it in a chat
-
Open a new chat and turn on Posteady under the Tools menu below the input box.
- A Developer Mode chat shows an indicator around the input box, and that chat's memory is turned off for security.
-
Ask in plain language, for example:
- "Show my Posteady workspaces"
- "List my connected Threads and X accounts"
- "Schedule a post on X for 9am tomorrow: 'New product launch D-1'"
- "Publish this to Threads and X now: [your text]"
- "Show my scheduled posts"
- "Show views and likes for last week's posts"
-
Actions like publishing, scheduling, or canceling ask for one more confirmation before they run. Review the action, approve it, and it's actually posted.
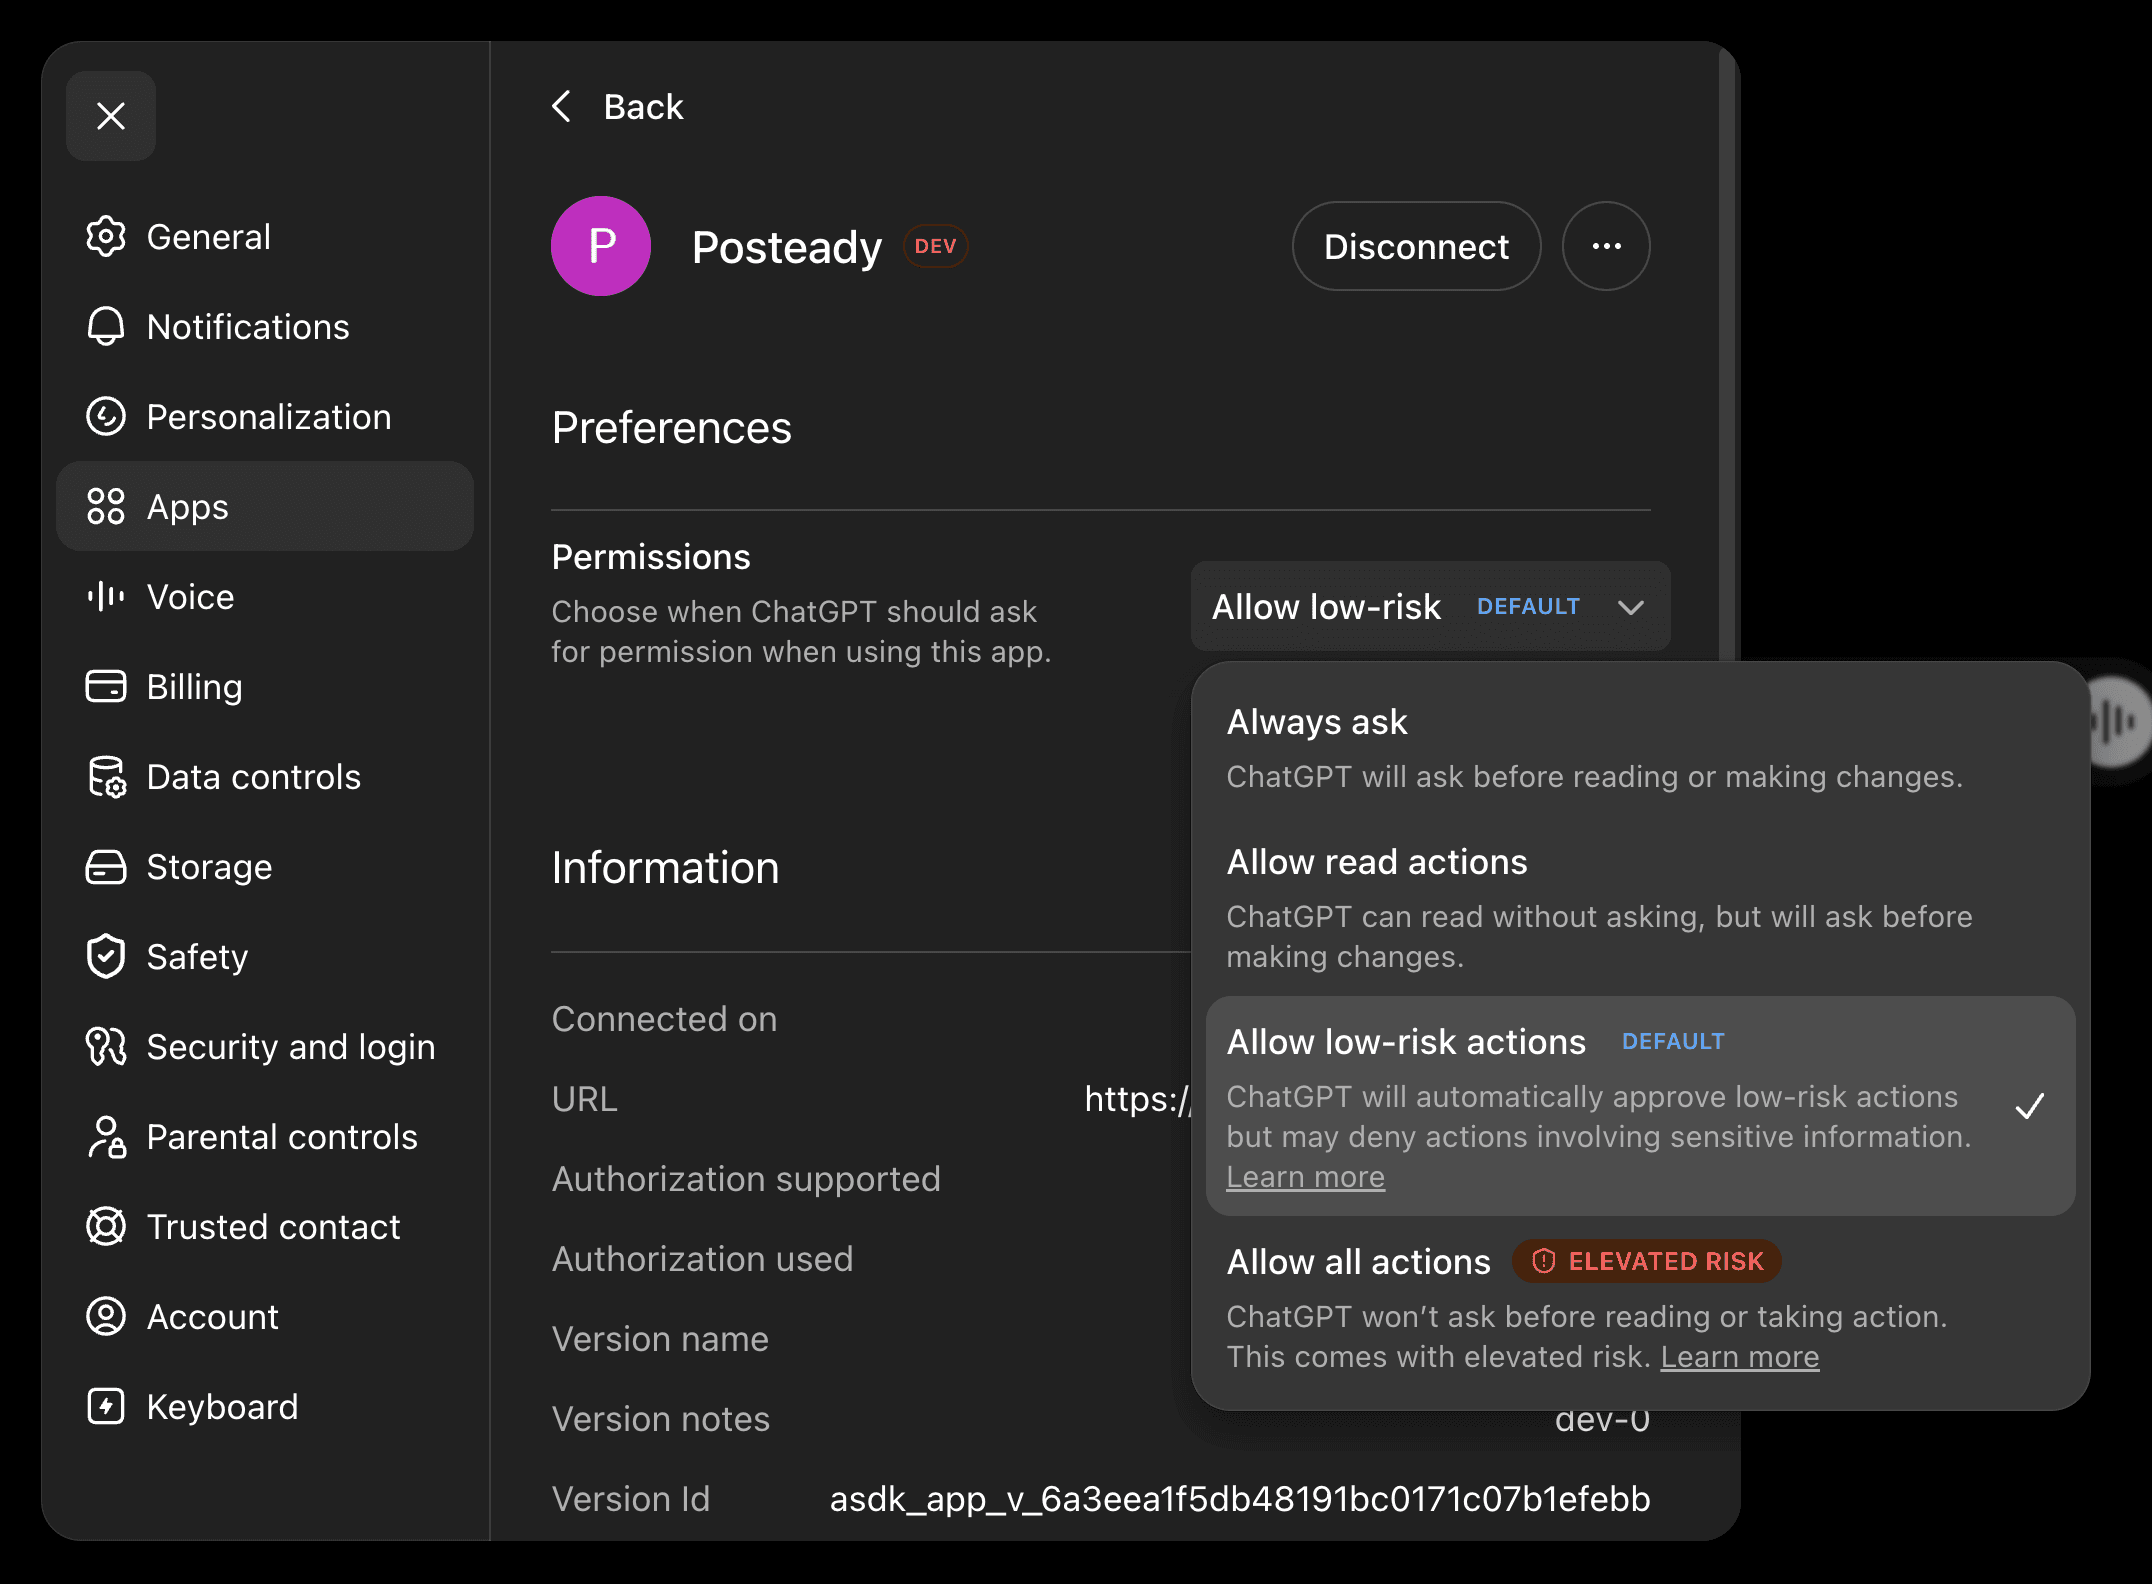
Permissions (optional)
You can control when ChatGPT asks for confirmation before running Posteady actions. Go to Settings → Apps → Posteady → Permissions and choose:
| Option | Behavior |
|---|---|
| Always ask | Asks before reading and making changes. |
| Allow read actions | Reads without asking, but asks before changes (publishing, scheduling). |
| Allow low-risk actions (default) | Auto-approves low-risk actions; may ask or deny for sensitive ones. |
| Allow all actions ⚠️ | Runs everything without asking — elevated risk. |
For actions that actually post (publishing, scheduling), keep the default — or Always ask — so you review before approving. Use Allow all actions with caution, since it skips confirmations.
Need help? See the FAQ or contact Posteady support.